
Buying a shed sounds straightforward until you start shopping for one. Pretty soon you’re weighing sizes, door placements, rooflines, colors, flooring, electrical and a dozen options you didn’t know existed. That’s a good problem to have (it means you can get exactly what you want), but it also means there’s more to think through than some folks expect.
We’ve spent more than 20 years building and delivering storage buildings across Virginia, Tennessee, Kentucky, Ohio and beyond. We’ve had a lot of conversations with customers about what they wish they’d known before they ordered, whether from us or someone else – so we’re in a good position to offer guidance.
Some good news: the regrets that sting the most rarely come down to the things you can see. If you buy from Timberline Barns, you get to preview the look of your shed – design it in our 3D builder, walk the lot for an in-stock building, or at least flip through photos. By the time it gets to your yard, color and style are no surprise.
So what SHOULD you look out for? These are the things you don’t see – or may not think to ask about – until the building is already in your backyard: the size of the shed, the ground beneath it, permits and regulations. Here are the 11 most common (and expensive) mistakes, and exactly how to sidestep each one.
The short version
If you only have 30 seconds, these are the mistakes that cost buyers the most money and the most regret:
- Buying the wrong size. Too small is the common regret, but too big happens as well. (We’ll show you a free way to nail the size of your portable building.)
- Ignoring the ground underneath. A shed is only as good as the ground it rests on.
- Shopping on sticker price alone. Cheap materials rot, sag and leak – and you might be skipping a promotion.
- Overlooking permits, setbacks, HOA rules and electrical. The codes (and fines) are real.
- Forgetting how it actually gets delivered. Measure your access first.
The full list – with the “why” and the fix for each – is below.
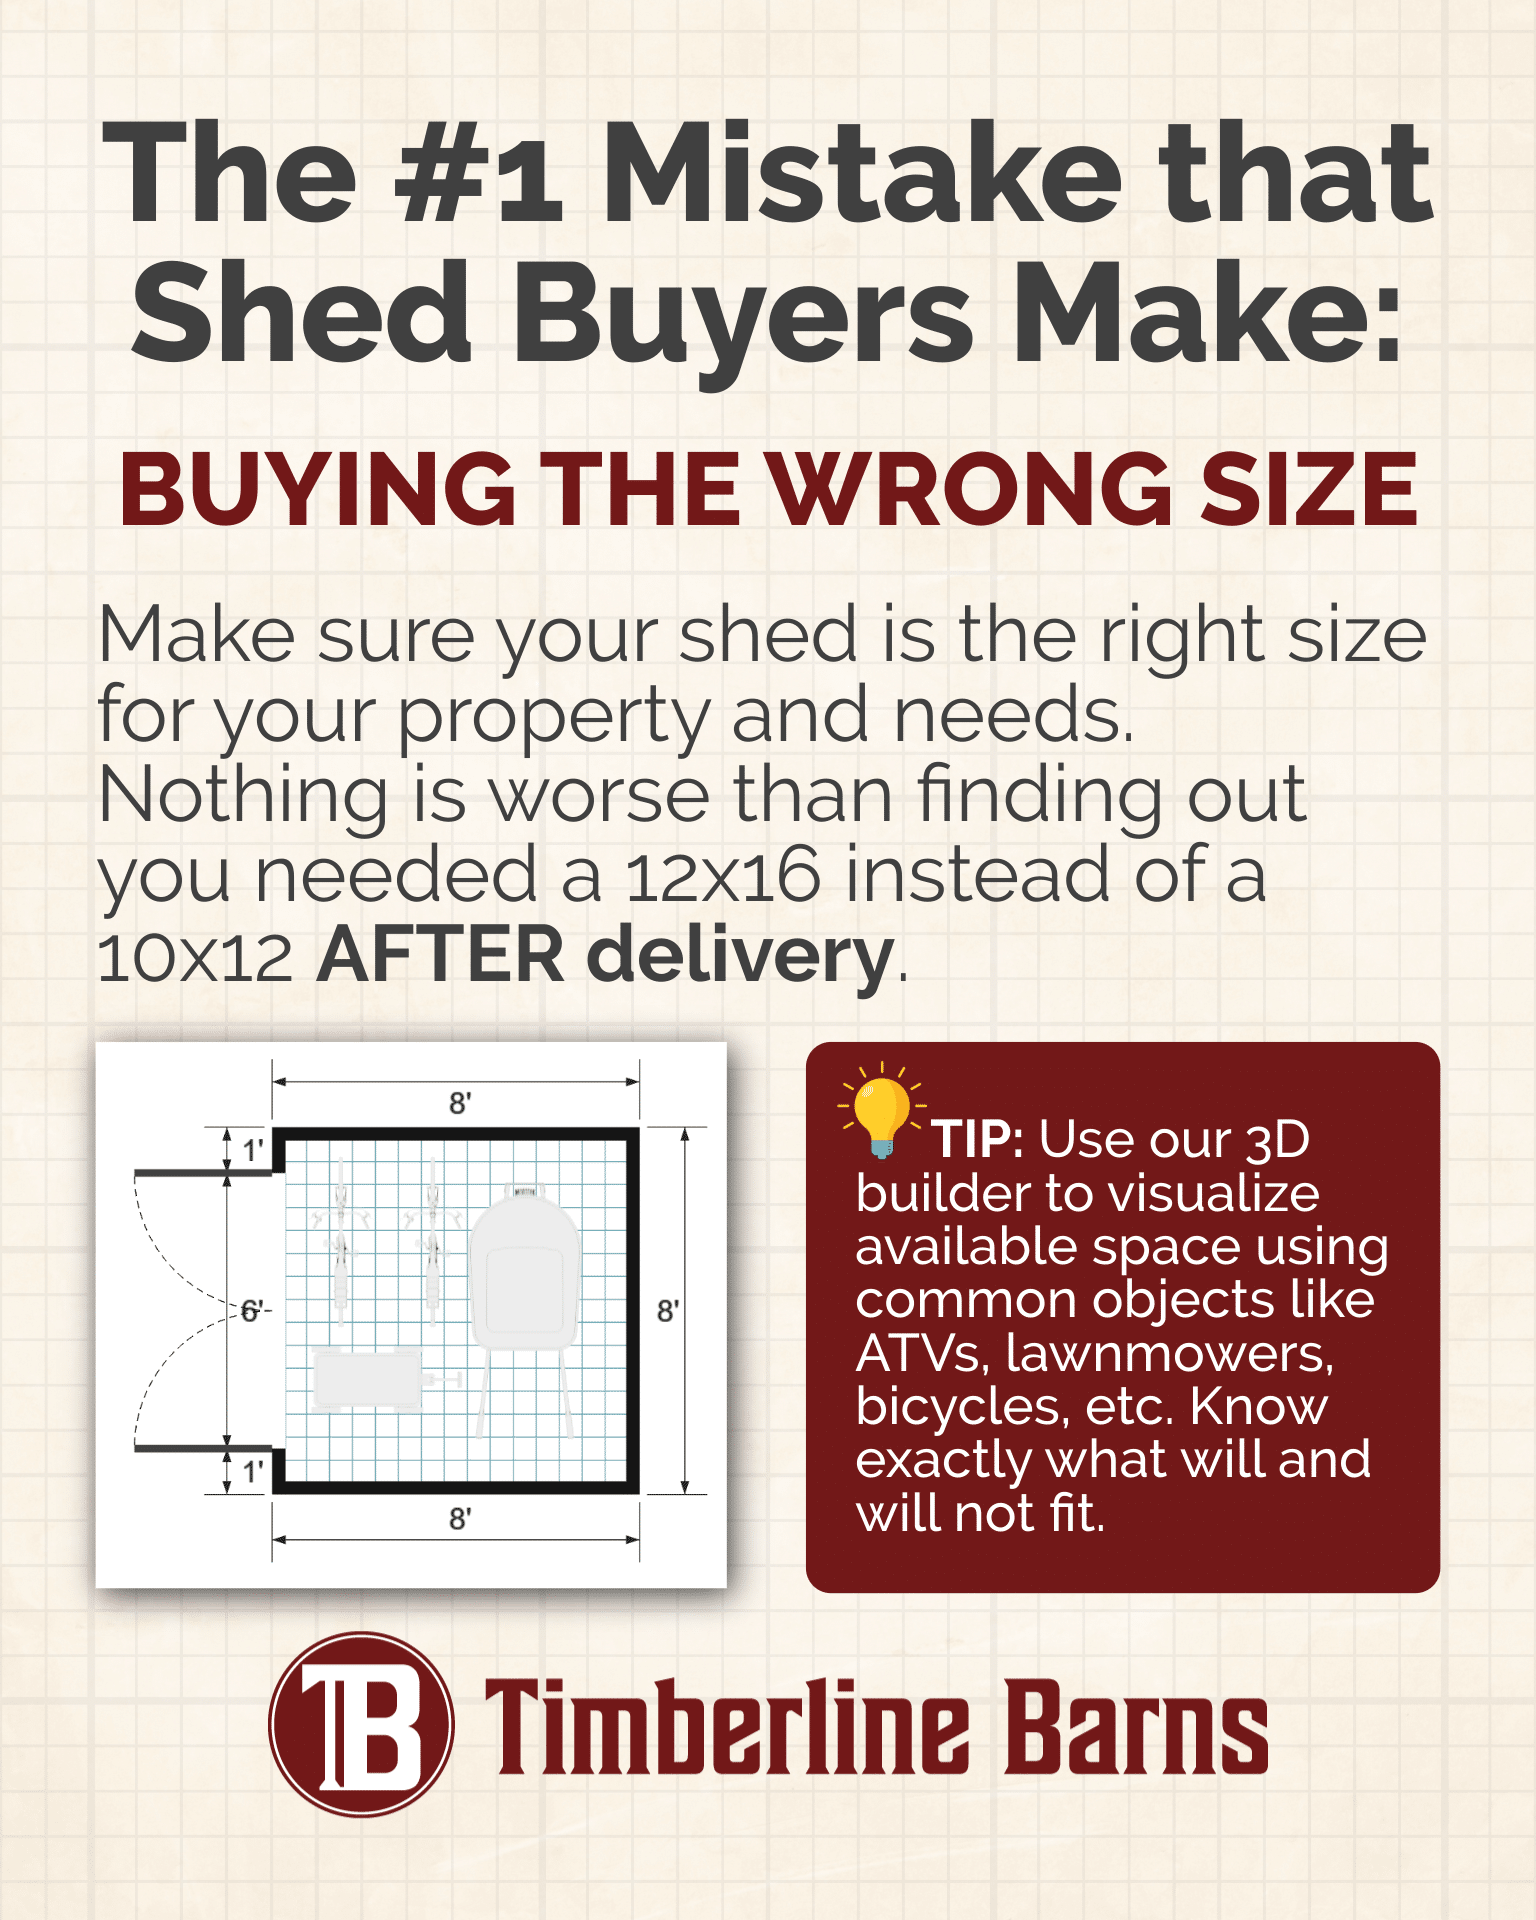
Mistake #1: Buying the wrong size – too small or too big
Ask a hundred shed owners what they’d change, and the most common answer is some version of “I’d get a different size.” Usually that means too small: a 10×12 looks roomy and empty the day it lands, and then the mower goes in, then the wheelbarrow, the bikes, the holiday totes, the bags of mulch – and suddenly you’re playing Tetris just to reach the back wall.
But too big is a real mistake too: an oversized shed is money you didn’t need to spend, yard you didn’t need to give up (or may not even have), and sometimes a harder time with setbacks and permits. We’d rather sell you the right shed than the biggest one.
Why it costs you: Undersize it and you pay twice when you outgrow it; oversize it and you overpay from day one. Either way, “wrong size” is the regret you live with every single time you open the door.
How to get it right: Match the building to what you’ll actually keep in it – with a little room to grow – instead of guessing. And here’s the good part: you don’t have to guess.
How to know what size you actually need (free Size Selection Helper)
Our 3D Builder has a feature made to help you pick the right sized shed for your needs, and it’s completely free:
- Click Design Your Shed from anywhere on our website and enter your ZIP code.
- Pick a building style – say, Pro Utility – End Door – and choose a size, like 10×16.
- Click Load in 3D.
- With the building loaded, click Size again. The preview flips from the 3D view to a 2D plan view – a top-down floor plan of your shed.
- Click Size Selection Helper.
- Now drag real items into the floor plan – an ATV, a riding mower, a workbench, a toolbox, a bed, bikes, furniture – and watch exactly how much room each one takes.
It’s genuinely eye-opening. You might be pleasantly surprised by how much fits in a 10×16 – or realize the size you had in mind is tighter than you pictured. Either way, you’ll order with confidence instead of crossing your fingers.
Mistake #2: Not thinking about the ground (and who preps it)
This is one is easy to miss. People obsess over the building and forget about the ground it sits on – and the ground is the unsung hero (or the silent saboteur) that decides whether your shed ages gracefully or starts fighting you in year two. Set a building straight on bare dirt and you’re inviting trapped moisture, a bouncy floor, sticking doors or pests looking for a way in.
Why it costs you: A poor base undercuts an otherwise great building – and it’s the one thing you can’t fix after delivery without lifting the whole shed.
How to get it right: First, relax – you don’t have to pour a slab or build up a gravel pad before you order. We set and level every building for you, and the labor to do it is free. We typically level on concrete blocks, and a gentle slope usually isn’t a dealbreaker – though the flatter and better-draining your spot, the better your building will sit and the longer it’ll last.
Two things worth knowing up front, because nobody likes a surprise on delivery day. First, while the leveling labor is free, the blocks themselves are a small added cost ($4 a piece at delivery) – and you’re welcome to supply your own if you’d rather; either way they’re a small additional cost. Second, if you’ve done no site prep at all, those blocks are genuinely the best, cheapest insurance you can buy: lifting the building up off the dirt is exactly what protects it from moisture and pests for years. If you want the gold standard, a level gravel bed or a concrete pad is hard to beat.
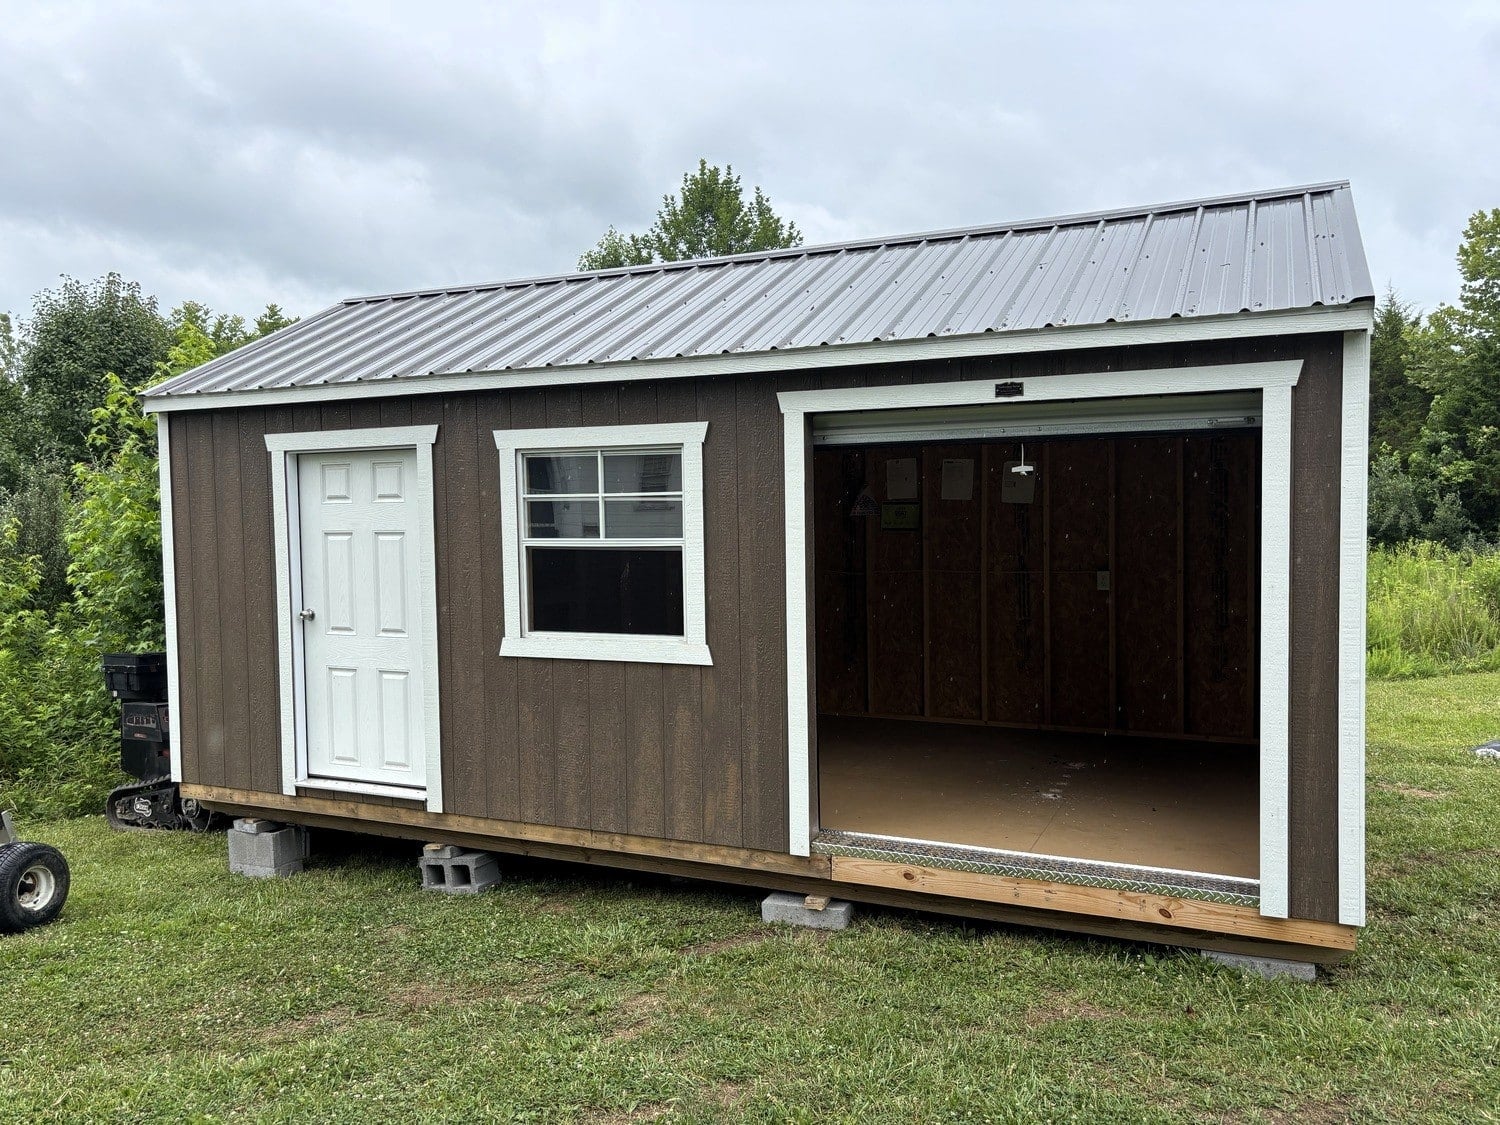
It helps that every Timberline building is framed on pressure-treated floor joists over notched 4×6 runners – built to ride down the highway and rest in any reasonably flat location, not just a perfectly poured slab. While you’re sizing up your spot, give a thought to location and access, too – more on that in Mistake #6.
Mistake #3: Shopping on sticker price alone
The cheapest shed is almost never the cheapest shed. A bargain big-box kit or a too-good-to-be-true lot price often hides thin panels, untreated lumber, poor quality fastenings, and a floor that can’t reliably hold heavy workbenches or toolboxes.
Why it costs you: The average homeowner spends around $4,000 on a shed, and prices range from a few hundred to $30,000. Spend at rock bottom and you often pay again within a few years. Spend wisely once and you won’t have to worry nearly as often.
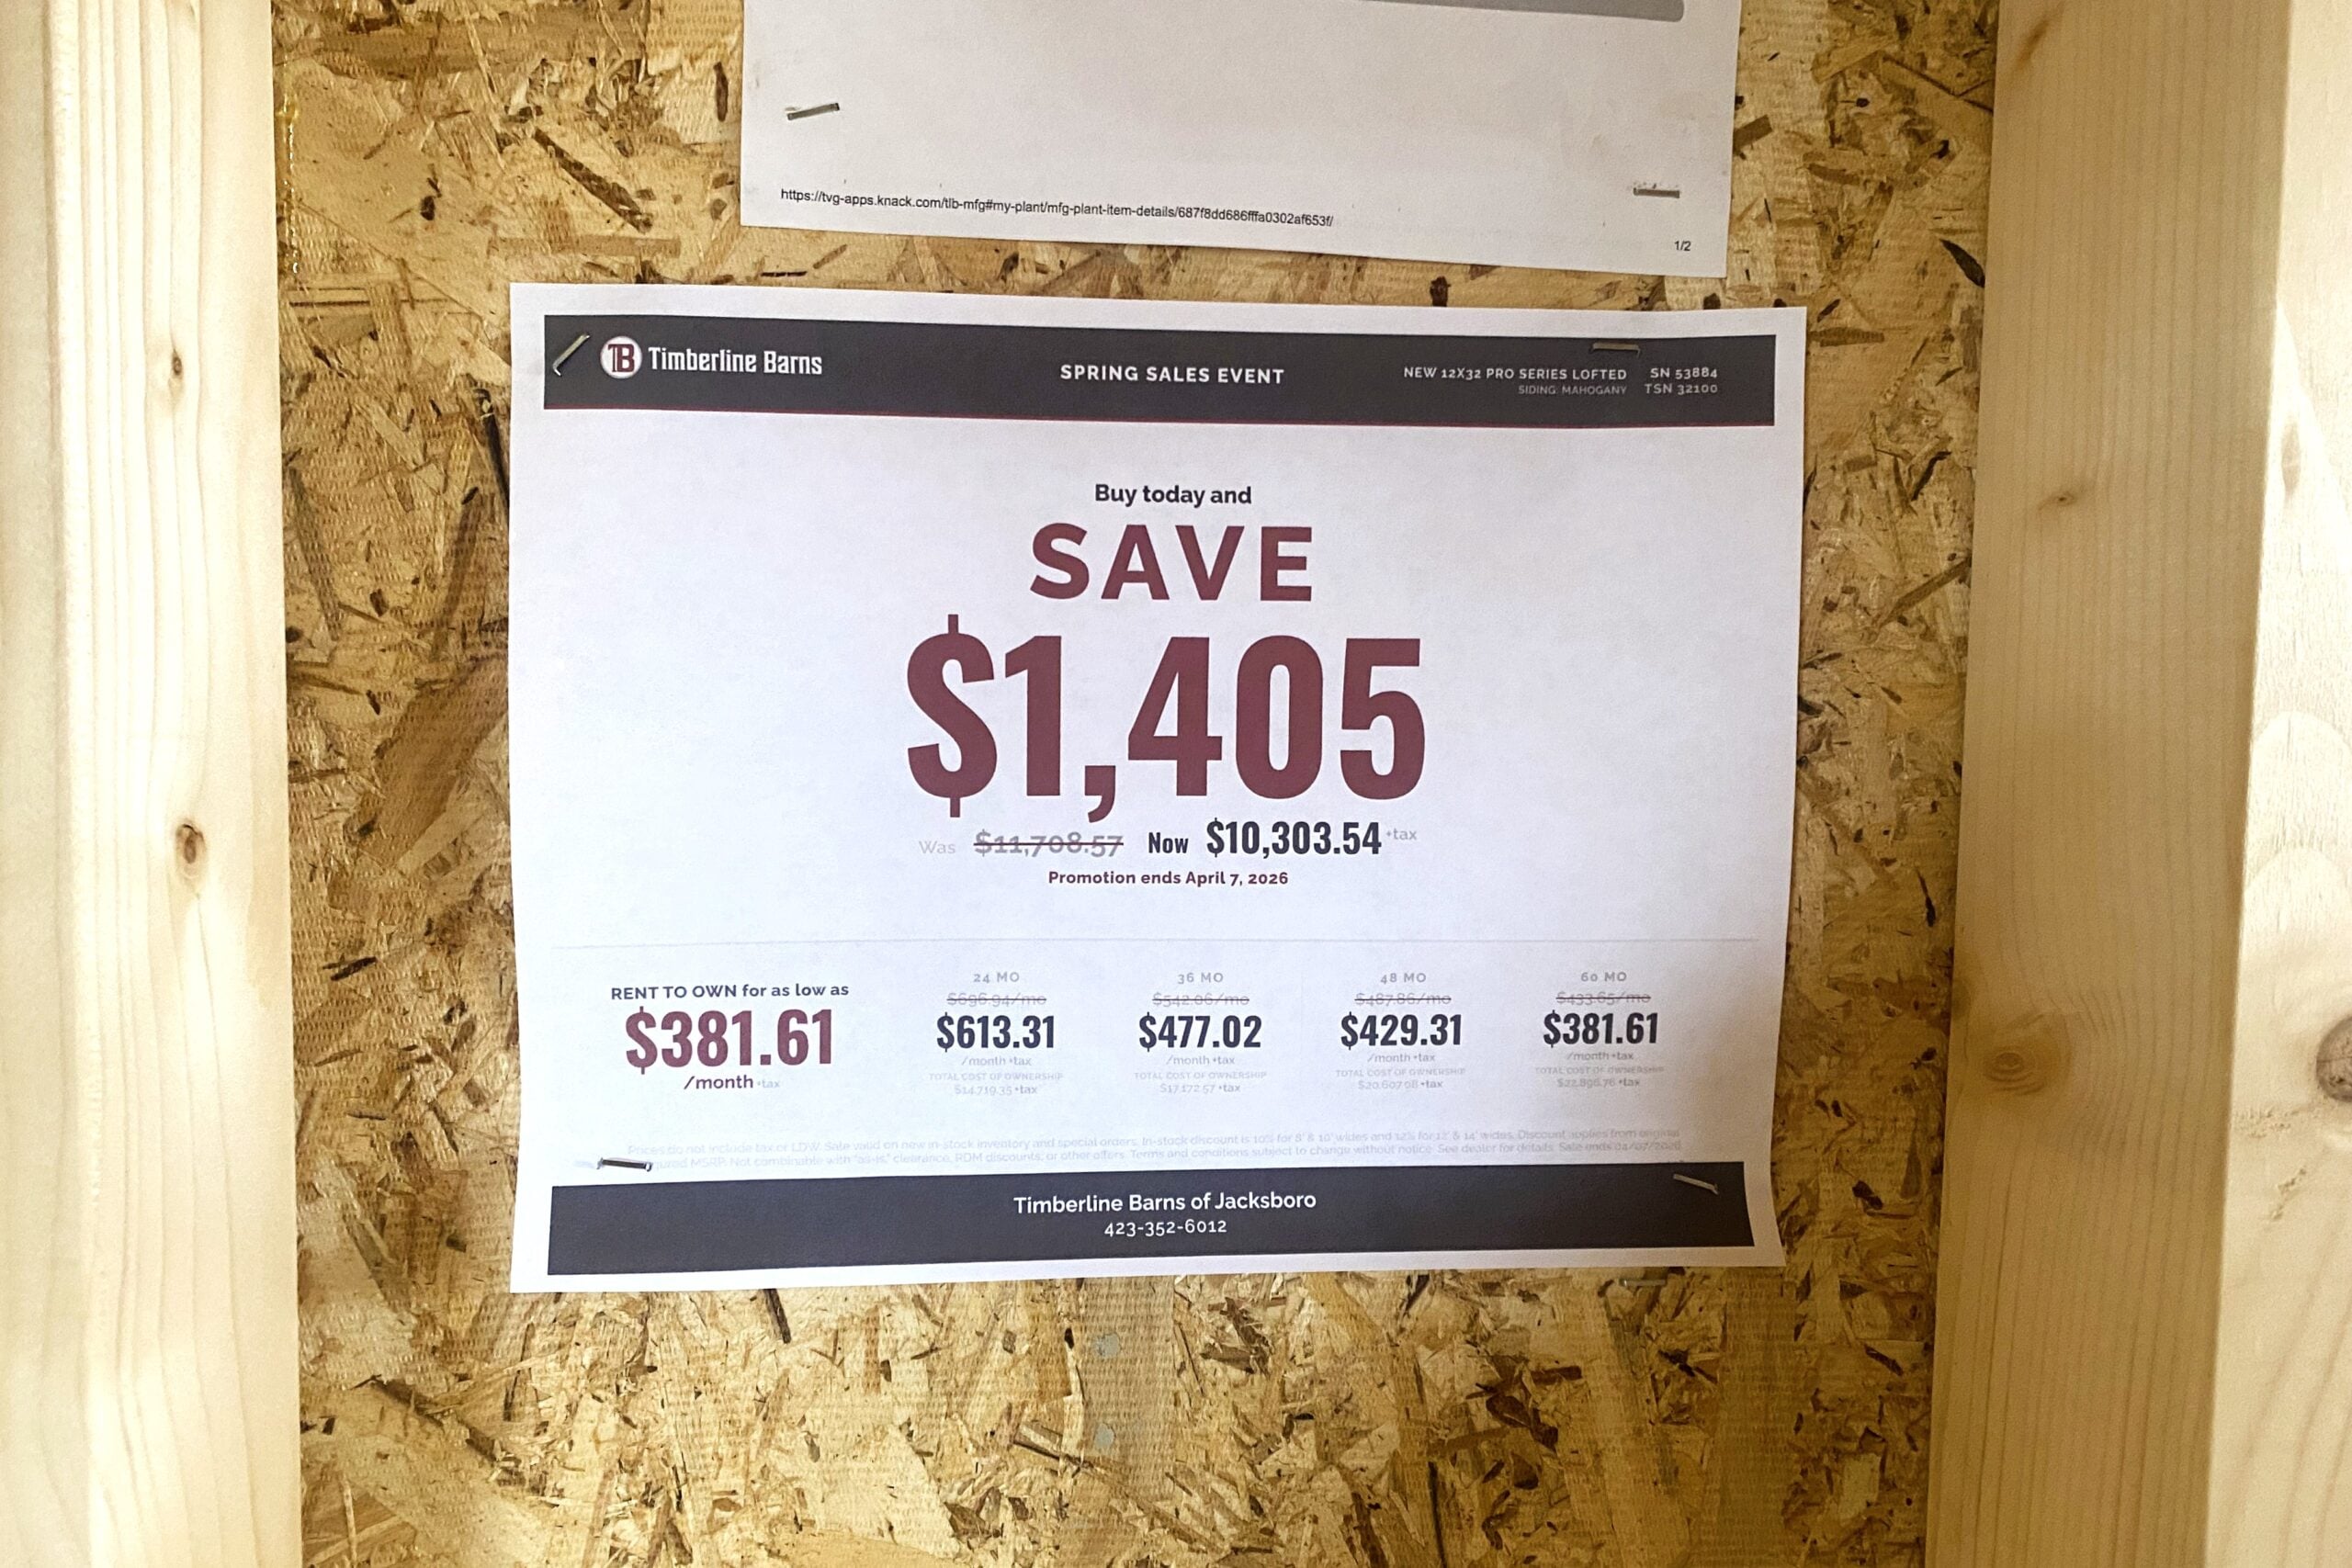
How to get it right: Compare cost per year of useful life, not just the number on the tag. Look at what the building is actually made of – treated lumber, real framing, quality roofing. A building that lasts 25 years at a fair price beats a “deal” you replace in six. And don’t pay full freight out of habit: sheds go on sale. Seasonal discounts and promotions can take a meaningful amount off the price – even on brand-new buildings in perfect condition – so it’s always worth checking our current promotions before you buy.
Mistake #4: Ignoring permits, setbacks and HOA rules
Plenty of buyers assume a shed is too small to bother anyone. Then a code officer or an HOA letter shows up. Rules vary by state, county, city and neighborhood: many areas require a building to sit a set distance – often around 3 feet – from side and rear property lines, and some HOAs require written approval before anything lands in the yard.
Why it costs you: Building in the wrong spot – or without approval – can mean daily fines of $25 to $100 and an order to move or remove the building entirely. HOA approval doesn’t replace a city permit, and a city permit doesn’t override your HOA.
How to get it right: Make two quick calls before you buy – one to your local permit office, one to your HOA. Confirm setbacks, easements and any size threshold that triggers a permit. The upside of a portable building is that it’s often treated more simply than permanent construction, but never assume.
Mistake #5: Not doing your homework on electrical
Adding power is one of the best upgrades you can make – it’s what turns a storage building into a workshop, a home office, a craft room or a hangout. Our electrical packages are among our most popular features (the Workshop especially), and for good reason. But “has electrical” raises a few questions that are much better answered before you order than after.
Why it costs you: Misunderstanding what a shed’s electrical package is – and isn’t – leads to frustration, a failed inspection, or a call to an electrician you didn’t budget for.
How to get it right: Here’s what to understand about a shed electrical package – ours, or anyone’s:
- It’s built for a shed, not a house. Our packages (a Basic and a Deluxe, differing mainly in the number of outlets and lights) are built to a solid standard for a portable building. They are not wired to residential code (IRC) and aren’t intended to serve as a home electrical system.
- Local codes vary – a lot. Electrical rules can change from one town to the next, even within the same county. It’s the owner’s responsibility to make sure the setup meets local requirements, which is why an electrical package typically comes with a waiver acknowledging exactly that.
- The layout is fixed. The number of outlets, where they sit, and where the breaker box goes are all part of a standard, pre-designed package – they can’t be moved, added to, or rearranged. So plan your workbench and shelving around the layout, not the other way around.
- Connecting to power is your job. We install the components inside the building, but we don’t hook the building up to an external power source – how that’s done depends on your site. Unless a customer is genuinely qualified to do it themselves, we encourage them to hire a licensed electrician.
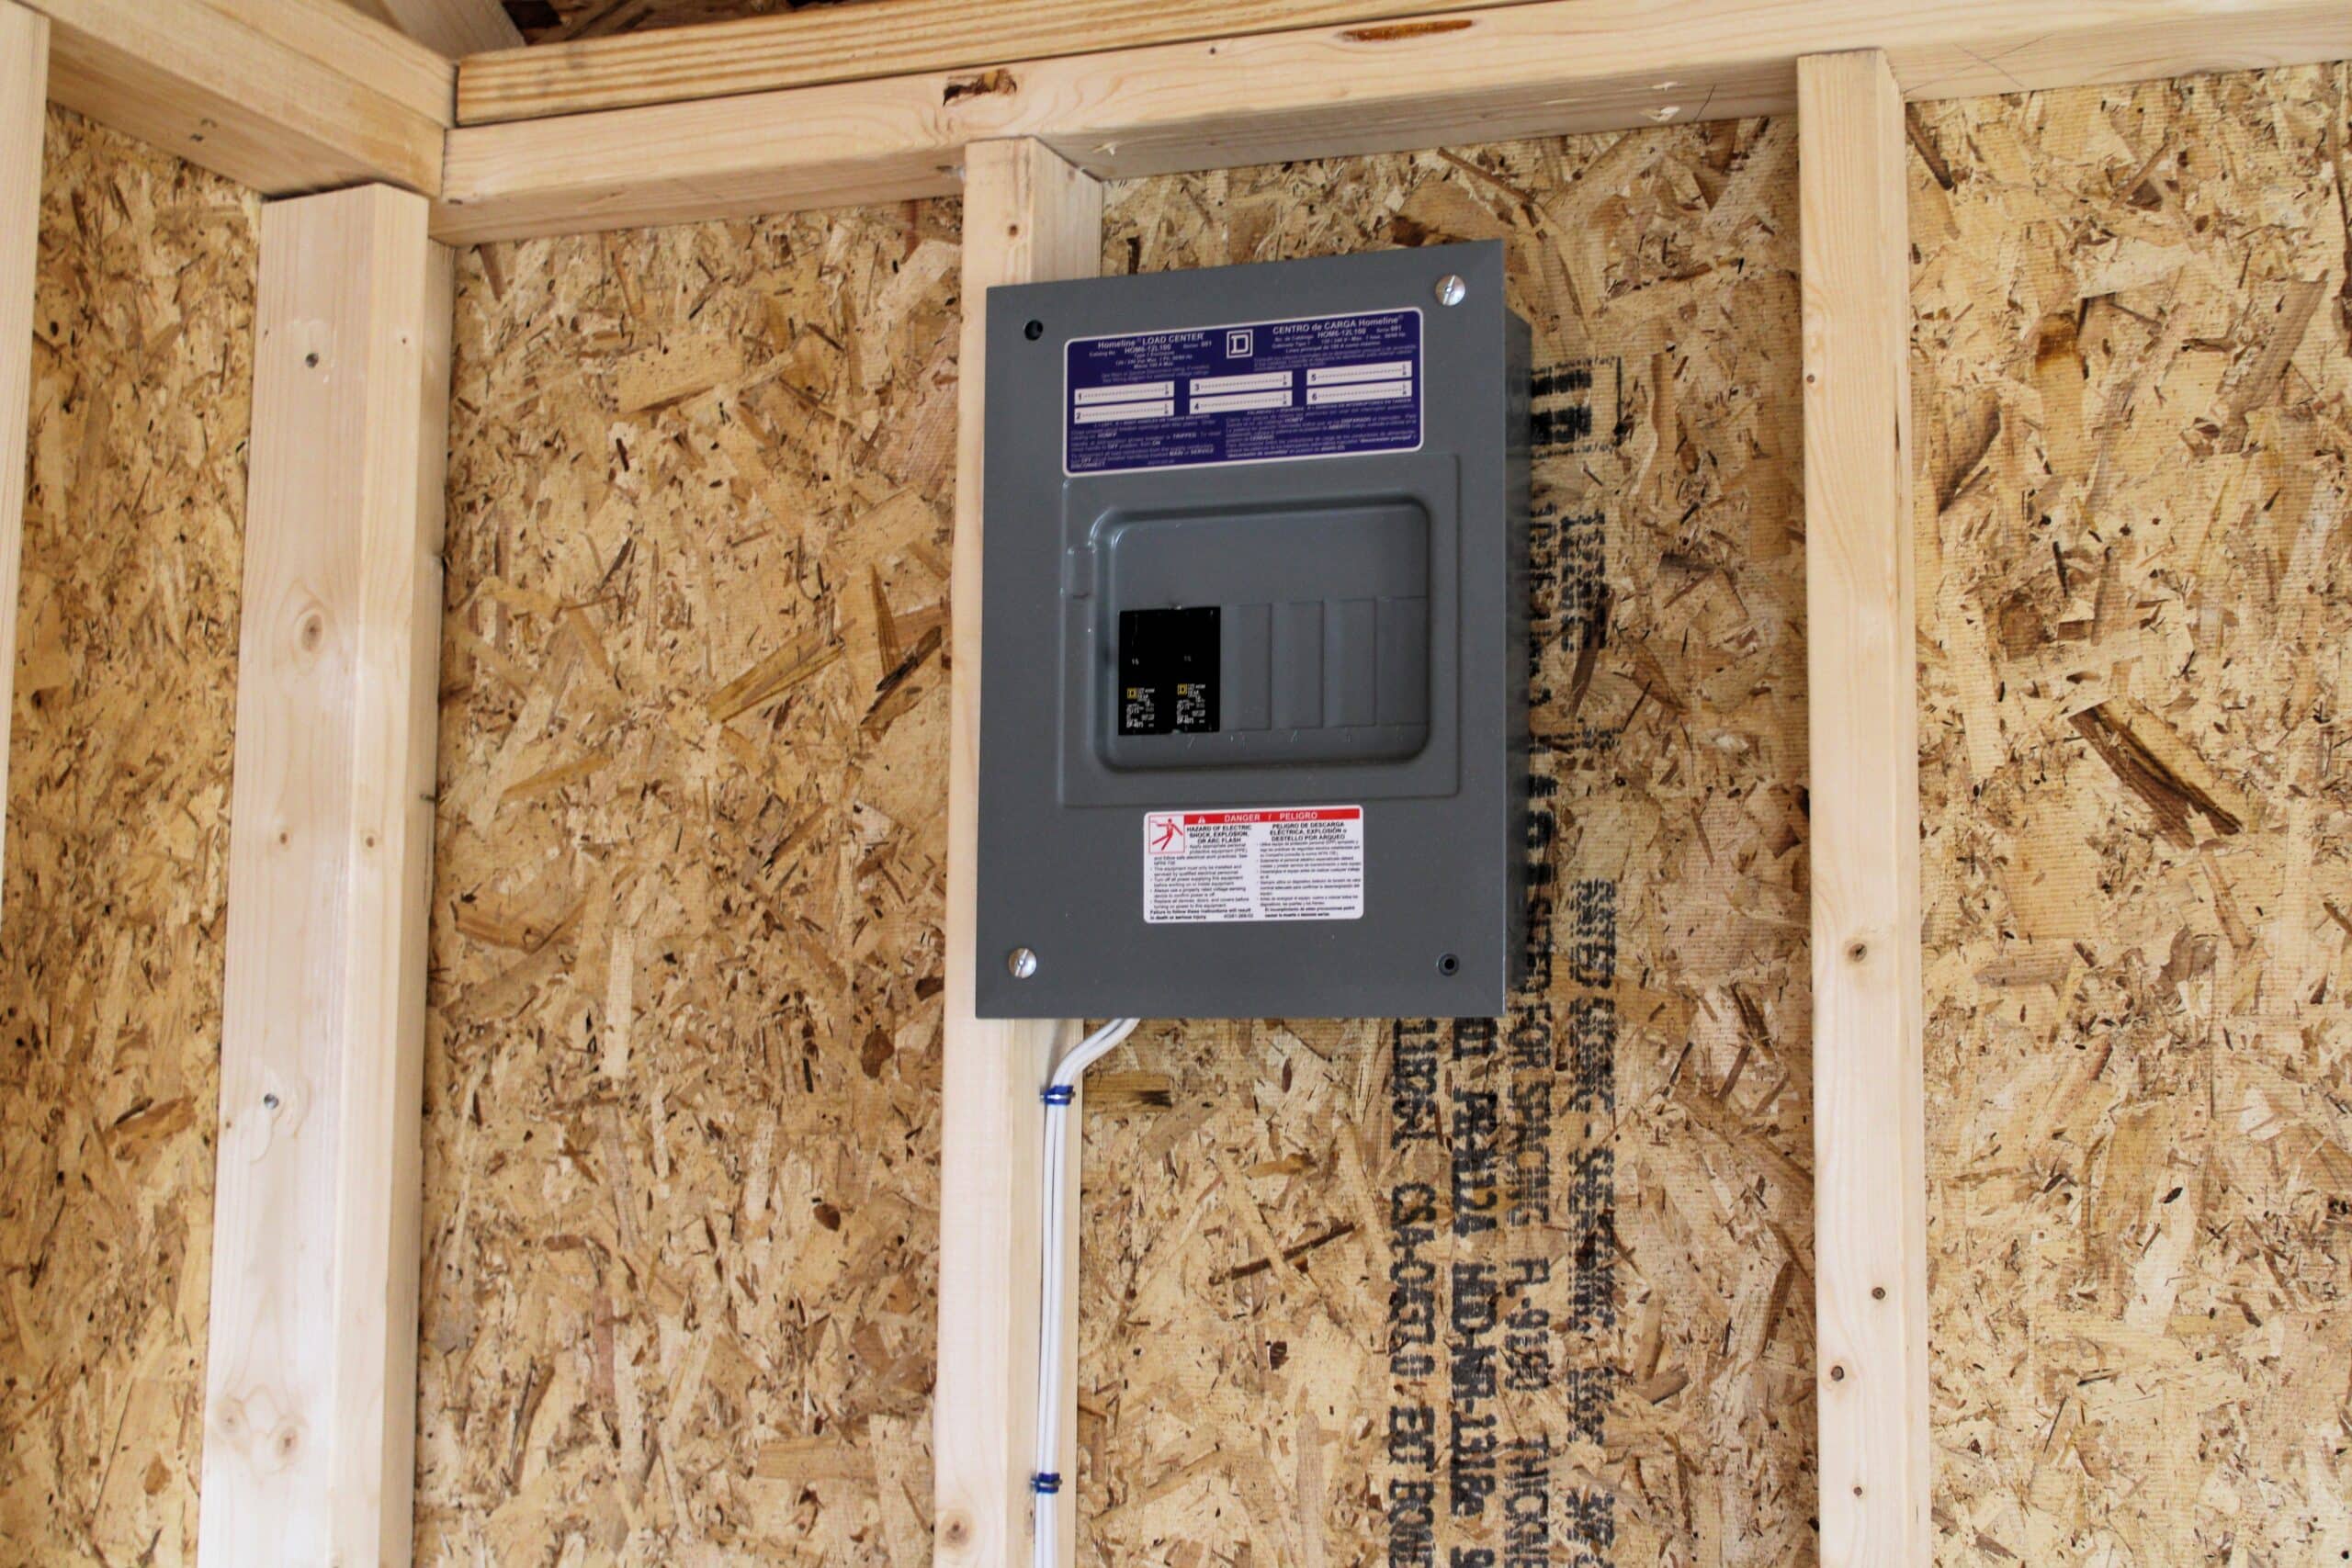
None of this is a reason not to buy an electrical package. Just go in informed, and ask your dealer to walk you through exactly what’s included so there are no surprises.
Mistake #6: Forgetting how a shed actually gets to your backyard
Some companies frame a shed in place, board by board, in your yard. We don’t – we build your building complete in our manufacturing facilities. We deliver deliver it finished and ready to use. That’s part of the reason a pre-built shed costs less than one built on site – but it also means the finished building has to get to its destination in one piece.
So you found the perfect 12-wide. Can it actually get back there? A surprising number of buyers end up purchasing a size that won’t fit through the gate, around the house, under low branches, or up the slope to the back corner. Delivery and placement can’t be an afterthought – they are considerations you should make before you place an order.
Why it costs you: A building that can’t reach its spot means re-routing, hand-moving, or in the worst case, sending it back.
How to get it right: Measure the narrowest point of your access – gates, fences, corners of the house – and note any slope, soft ground or overhead wires and branches. Take margin into consideration as well: our installers generally need at least a foot of clearance beyond the building’s width, so a 12-wide building needs an opening at least 13 feet wide. Then tell your dealer – Timberline delivers and professionally places your building, with free delivery within 50 miles of any of our 50-plus dealer lots. If there’s any doubt about whether your property has the access required to make delivery, we can make a free site check ahead of time.
Mistake #7: Overlooking the floor and what’s underneath it
The floor is the part buyers inspect least and lean on most. Budget buildings love to cut corners here – thin panels, joists spaced too far apart, sometimes barely a real floor at all. You won’t notice on delivery day. You’ll notice when the riding mower leaves a dip, when the floor goes spongy near the door, or when mice find the gap between the building and the dirt.
Why it costs you: A weak floor invites moisture, pests and sag – and it’s nearly impossible to fix once the building is loaded and in place.
How to get it right: Before you buy, ask exactly what’s beneath your feet: joist size, joist spacing, runner size, and whether the lumber is pressure-treated. For the record, our flooring is PerformMax 5/8″ tongue-and-groove coated flooring. It’s not the fanciest floor around, but it’s tough and durable. The tongue-and-groove fit is a real step up from the loose panels you’ll find on a lot of buildings. Underneath, every Timberline building sits on treated joists over notched 4×6 runners – the same backbone that survives a highway trip is what keeps your floor solid for years to come.
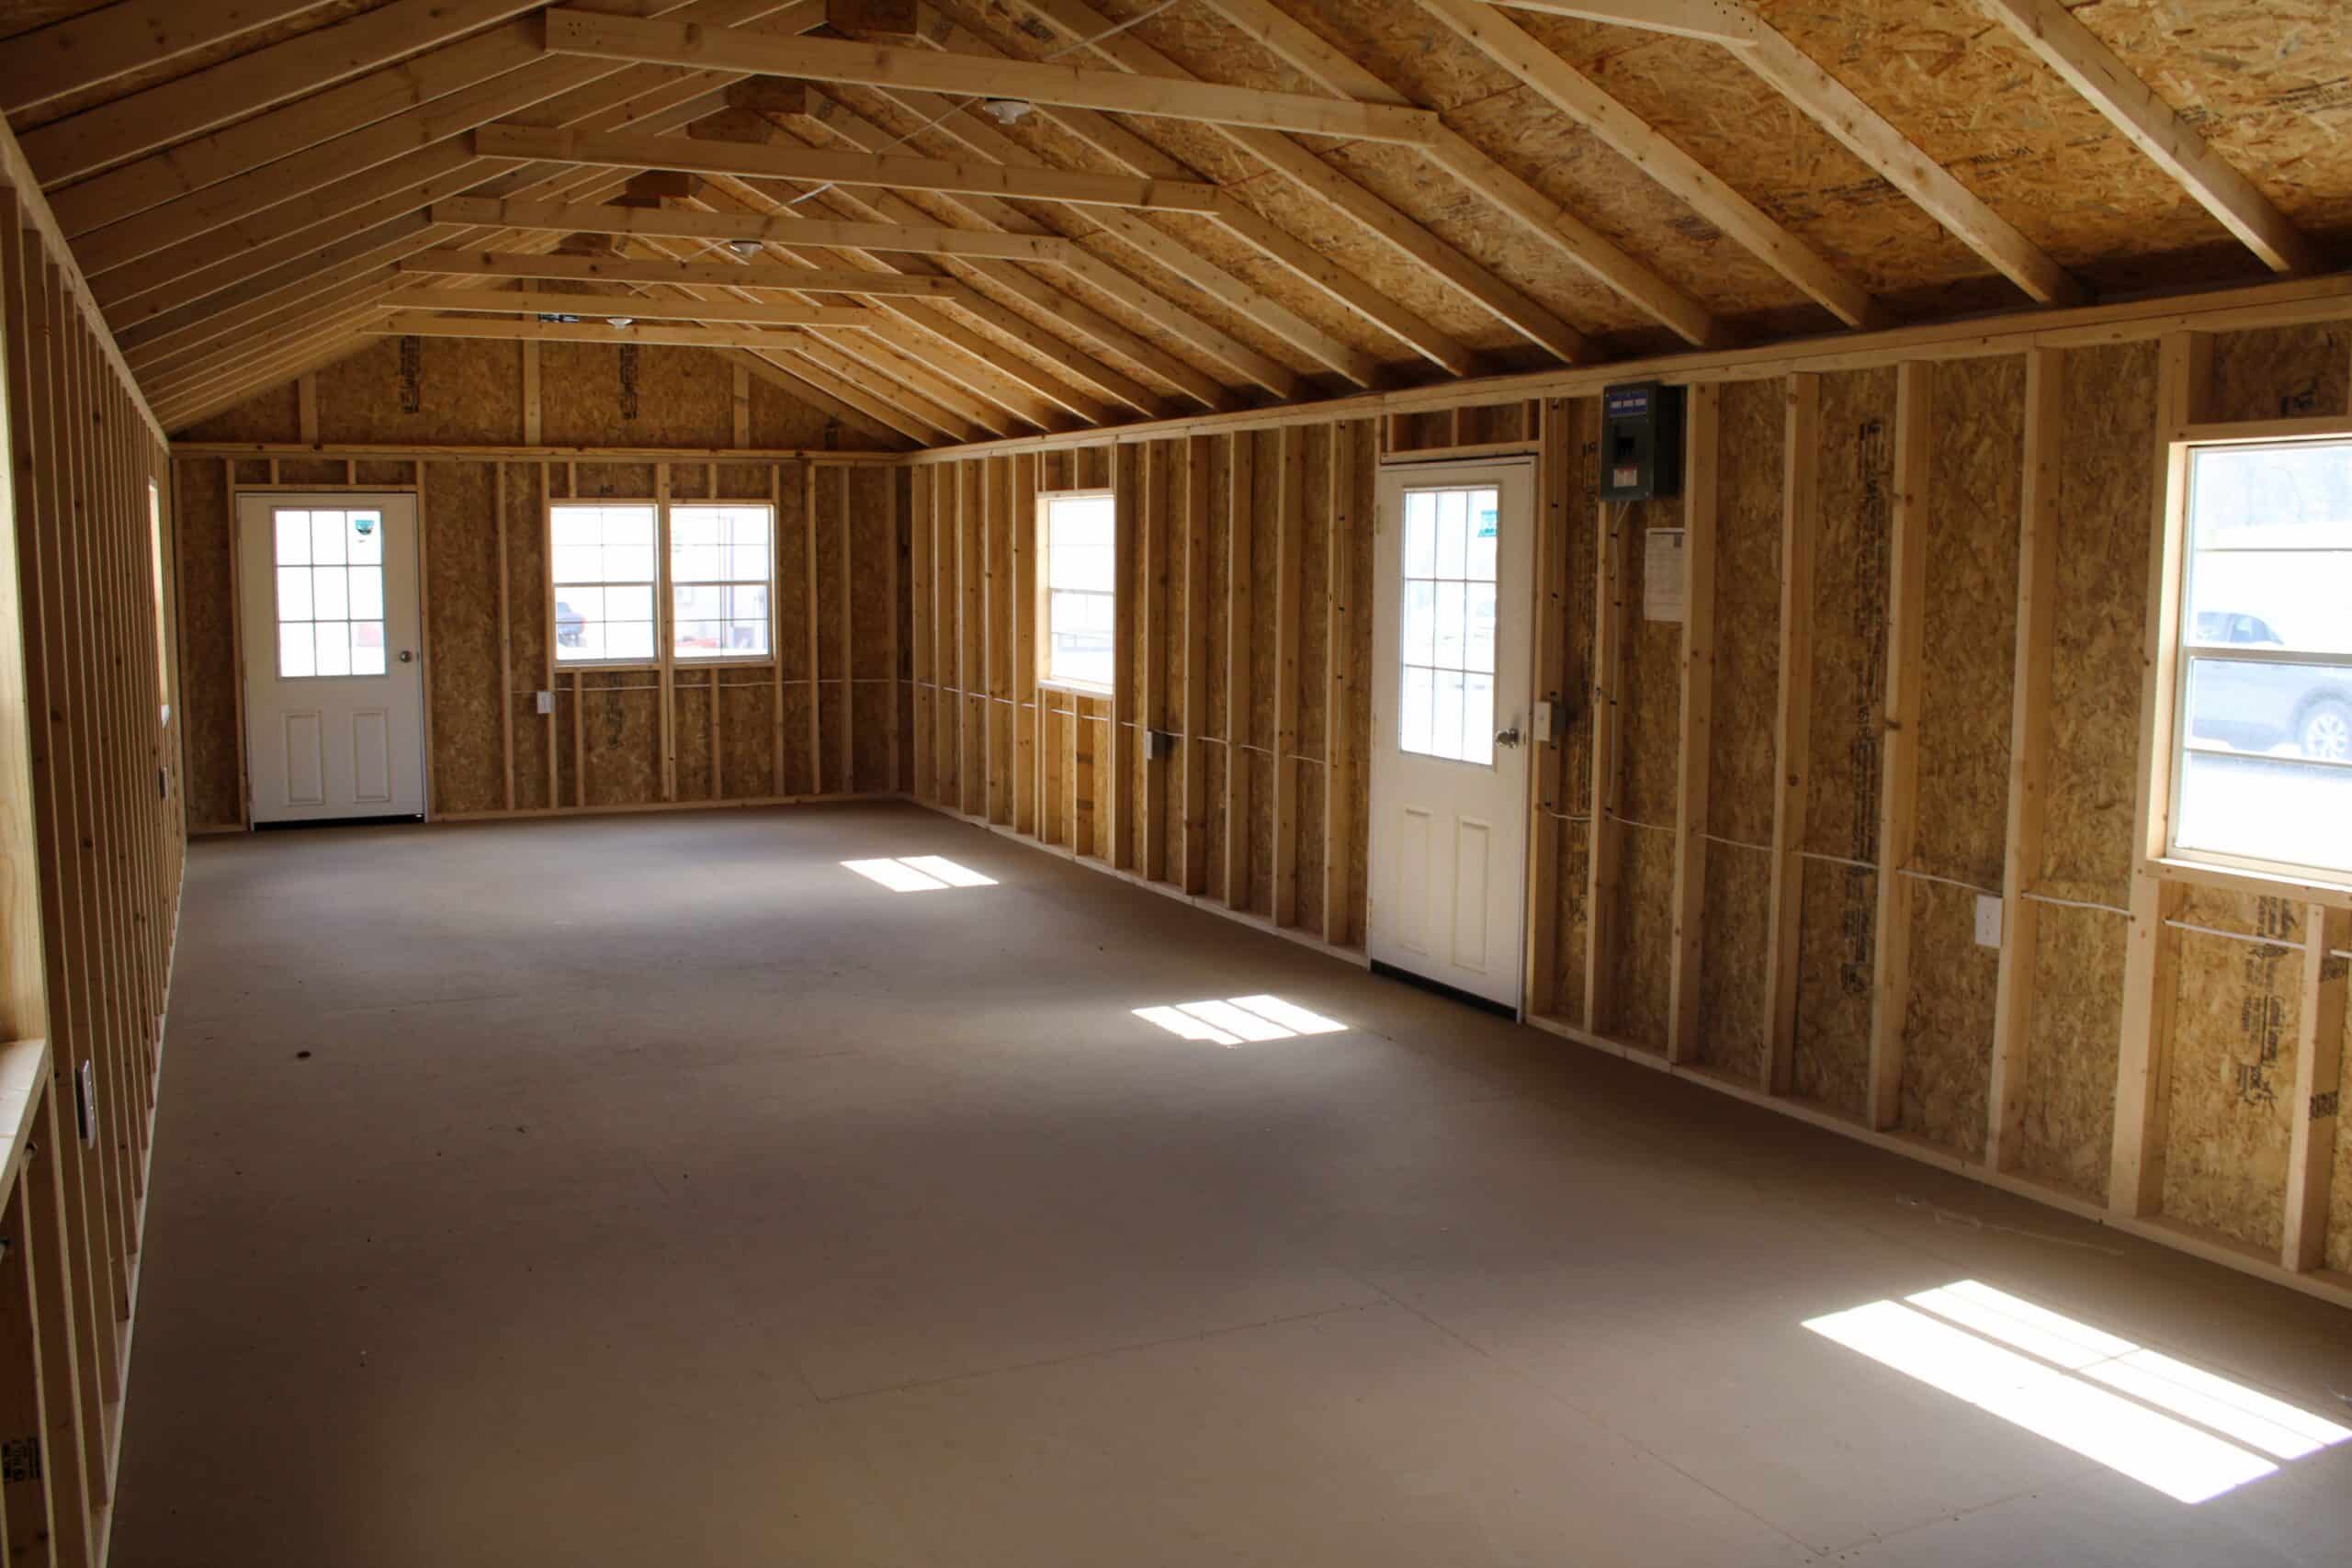
Mistake #8: Ignoring ventilation and moisture
A sealed-up box in the sun quickly becomes a humid, musty oven. Without airflow, condensation collects on the underside of the roof, drips onto your belongings, and breeds mildew and rust. People store their good tools, mowers and seasonal gear in a shed precisely so they’ll last – and then accidentally cook them in trapped humidity.
Why it costs you: Mold, rust and that unmistakable musty smell can ruin the very things you bought the shed to protect.
How to get it right: Plan for airflow – gable vents, a ridge vent, or windows that open. Place the building where it gets some sun and air rather than buried against a fence in deep shade, and keep that base draining well. A few well-placed vents are inexpensive insurance for everything inside. By default, every shed we offer comes with at least two gable vents (one on each end) so there’s always somewhere for moisture to go.
Mistake #9: On a custom build, putting form over function
When you spec a custom building, it’s tempting to design for the photo instead of for the way you’ll actually use it. This shows up in two sneaky ways: doors that are too small for what’s going inside, and windows and doors placed for looks instead of work.
Start with the doors, because this one catches even good planners off guard. A building can be exactly the right size and still not work if the door is wrong. A golf cart fits the floor space easily – but its roof is taller than a standard 6×6 roll-up door, so it needs a full 9×7 garage door to clear. Same story with a zero-turn mower with a roll bar that doesn’t fold down: it simply won’t duck under a 6×6. The lesson: don’t just think about what you need to fit in the shed – think about how it’s going to get through the door. (It’s the same principle as getting the building to your property back in Mistake #6: plan the how, not just the what.)
The other half is placement. On a custom order you decide where the windows and doors go, and a little restraint pays off. Put a window right where your workbench and pegboard wall belong, or a door where your shelving should run, and you’ll be fighting that choice every time you step inside. Getting too creative usually costs you function – and it doesn’t always buy you better looks, either.
Why it costs you: A beautiful building you have to work around is a daily annoyance – and on a custom build, those choices are baked in for good.
How to get it right: Start with the verbs. What will you do in there – park, build, store, pot plants, run a side business? Spec your door sizes for the biggest thing going in (and how it gets in), then place windows and doors to serve the work first. Double doors or a 9×7 for equipment, extra windows for a workshop, lofts for seasonal storage. Our 3D Builder lets you try layouts before you commit so the building ends up sensible and good-looking.
Mistake #10: Not asking about warranty, build quality and longevity
A shed is a big purchase that should outlast a decade easily. Yet buyers routinely sign up without asking the obvious question: what happens if something goes wrong, and how long is this really built to last? A handshake from a one-season lot operator is not a warranty.
Why it costs you: No warranty means every future problem is yours alone – and a poorly built shed becomes a maintenance project instead of a set-and-forget asset.
How to get it right: Ask for a warranty in writing and read what it covers. Look at the build: treated framing, quality fasteners, real roofing, solid doors. Every new Timberline building comes with a 5-year craftsmanship warranty and is engineered to last for decades. (We also sell inspected pre-owned and repossessed buildings, which can be a genuinely smart way to save – just know they’re offered under different terms, not the full new-building warranty. We break down when one’s worth it in our guide, Is a repo shed worth buying?)
Mistake #11: Misunderstanding rent-to-own – in either direction
Two opposite mistakes show up here. Some buyers stretch to pay all cash and end up under-buying – a smaller or thinner building than they really need, just to hit today’s number. Others jump into rent-to-own without fully reading the terms, then feel blindsided later when the total adds up to more than the sticker price.
Why it costs you: Under-buying circles you right back to Mistakes #1 and #3. And going into rent-to-own without understanding it can turn a useful tool into an unwelcome surprise.
How to get it right: Rent-to-own is worth considering, especially if buying outright isn’t in the cards right now. You make an initial payment and pay over time – no credit check, and no penalty for paying it off early (paying it down quickly is the smart play). Just go in clear-eyed: rent-to-own carries a higher total cost of ownership (TCO) than paying cash. We put the TCO for rent-to-own on our promotional signage and in every contract. Know what you’re getting into and rent-to-own can be a great instrument; skipping that step can lead to surprises. If it fits your situation, here’s exactly how our rent-to-own program works.
Your quick pre-purchase checklist
Run through this before you put money down on any shed, from anyone:
- Size: Did I match the building to what I’ll actually store? (Remember to try the free Size Selection Helper in our 3D Builder).
- Site: Is my spot reasonably flat and well-draining?
- Price: Did I compare cost per year and check for current promotions?
- Rules: Did I confirm permits, setbacks and HOA approval?
- Electrical: If it has power, do I understand what’s included, the fixed layout, and who connects it?
- Access: Did I measure my narrowest delivery point?
- Floor & frame: Do I know the flooring, joist size, spacing and runners?
- Materials & warranty: Is the lumber treated and the warranty in writing (and do I know new vs. pre-owned terms)?
- Airflow: Does it have ventilation for my climate?
- Layout & doors: Will my door sizes fit what’s going in (and how it gets in), and does the layout suit how I’ll use it?
- Payment: Did I compare cash vs. rent-to-own, including the total cost of each?
Frequently asked questions
What is the most common mistake when buying a shed?
Buying the wrong size. Too small is the most common regret – storage needs grow faster than people expect – but too big wastes money and yard space, so the real goal is the right size. Our free Size Selection Helper lets you drag items like a mower or ATV into a 2D floor plan to see exactly what fits before you order.
How do I know what size shed I need?
Start with what you’ll store and how you’ll move around it, then add a little room to grow. The easiest way is ti yse our free Size Selection Helper: open our 3D Builder, pick a style and size, load it in 3D, click “Size” to switch to the 2D plan view, then choose “Size Selection Helper” and drag in items like an ATV, riding mower, workbench or furniture to see what actually fits. Customers are often surprised one way or the other – either by how much fits, or by how tight their planned size really is.
What size garage door do I need for a golf cart or zero-turn mower?
Often bigger than people expect. A standard 6×6 roll-up door usually isn’t tall enough for a golf cart’s roof or a zero-turn mower with a fixed roll bar – a 9×7 garage door will give the clearance you need. Measure the tallest point of whatever you’re parking before you choose a door, because the building can be the right size and still not work if the opening is too small.
Do I have to prepare the ground before my shed is delivered?
Not necessarily. Timberline sets and levels every building for you, and that labor is free – we typically level on concrete blocks, and a gentle slope usually isn’t a problem. The blocks themselves are a small added cost ($4 a piece – or you’re welcome to supply your own), and lifting the building off bare ground is the best low-cost protection against moisture and pests. For the longest life, a level gravel pad or concrete slab is the gold standard, but it isn’t required to order.
Do I need a permit to put a shed in my backyard?
It depends on your location and the size of the building. Many areas exempt small sheds but enforce setback rules (often around 3 feet from property lines), and many HOAs require written approval. Building without the right approvals can lead to fines of roughly $25 to $100 per day and an order to remove the shed, so always check with your local permit office and HOA first.
Do Timberline sheds come with electricity?
Several models can be ordered with an electrical package – a Basic or a Deluxe option. They’re built to a solid standard for a portable building, but they aren’t wired to residential (IRC) code, the layout is fixed (outlets and breaker box can’t be relocated), and local electrical codes vary by municipality. Timberline installs the components but doesn’t connect the building to an external power source – that’s the owner’s responsibility, so hire a licensed electrician unless you’re qualified to do the work yourself.
How much should I spend on a quality shed?
The average homeowner spends around $4,000, with prices ranging from a few hundred dollars to $30,000 depending on size, materials and features. Judge value by cost per year of useful life rather than sticker price – and watch for seasonal promotions, which can lower the price even on brand-new buildings.
Can I buy a shed without paying the full price up front?
Yes. When placing an order, only a 10% deposit is required, with the rest being collected at delivery. At Timberline we also partner with rent-to-own providers requiring no credit checks and no penalties for early payoff. Just know that rent-to-own has a higher total cost of ownership than paying cash; that total is shown on our signage and in every contract, so read the terms and choose the option that best fits your budget.
Buy the right shed the first time
Avoid these 11 mistakes and you’ll skip the regret that sends so many people back to the lot a few years later. The goal isn’t just a shed – it’s the right shed: properly sized, solidly built, set on good ground, and backed by people who’ll still be here when you have a question. Here’s where to go next:
- Find a dealer near you. Walk a lot, kick the floors and see the quality in person. Find your nearest Timberline dealer →
- Design your own shed. Build it your way – size, doors, windows, color and layout – with our online configurator. Start designing your shed →
- See current promotions. Check what’s on offer right now before you buy. View this month’s promotions →